在本教程中,我们将向您展示如何在 Debian 11 上安装 Memcached。对于那些不知道的人,Memcached 是一种高性能的分布式内存对象缓存系统,通过减轻数据库负载。 这减少了必须读取外部数据源的次数,从而降低了开销并加快了响应时间。 内存缓存软件是一个免费的开源项目,任何人都可以使用。
本文假设您至少具有 Linux 的基本知识,知道如何使用 shell,并且最重要的是,您在自己的 VPS 上托管您的站点。 安装非常简单,假设您在 root 帐户中运行,否则您可能需要添加 ‘sudo‘ 获取 root 权限的命令。 我将向您展示在 Debian 11 (Bullseye) 上逐步安装 Memcached。
在 Debian 11 Bullseye 上安装 Memcached
步骤 1. 在我们安装任何软件之前,请务必通过运行以下命令来确保您的系统是最新的 apt 终端中的命令:
sudo apt update sudo apt upgrade
步骤 2. 在 Debian 11 上安装 Memcached。
默认情况下,Memcached 在基础 Debian 11 存储库中可用。 现在运行以下命令来安装它:
sudo apt install memcached libmemcached-tools
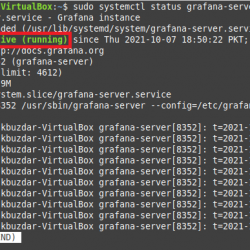
安装后,Memcached 服务会自动启动。 您可以通过检查服务的状态来验证它:
sudo systemctl status memcached
步骤 3. 配置 Memcached。
Memcached 配置文件是 /etc/memcached.conf 我们可以通过运行来修改 Memcached 配置:
sudo nano /etc/memcached.conf
在下面的文件中,找到 localhost IP 127.0.0.1。 用您的实际服务器 IP 替换它:
# memcached default config file # 2003 - Jay Bonci <[email protected]> # This configuration file is read by the start-memcached script provided as # part of the Debian GNU/Linux distribution. # Run memcached as a daemon. This command is implied, and is not needed for the # daemon to run. See the README.Debian that comes with this package for more # information. -d # Log memcached's output to /var/log/memcached logfile /var/log/memcached.log # Be verbose # -v # Be even more verbose (print client commands as well) # -vv # Start with a cap of 64 megs of memory. It's reasonable, and the daemon default # Note that the daemon will grow to this size, but does not start out holding this much # memory -m 256 # Default connection port is 11211 -p 11211 # Run the daemon as root. The start-memcached will default to running as root if no # -u command is present in this config file -u memcache # Specify which IP address to listen on. The default is to listen on all IP addresses # This parameter is one of the only security measures that memcached has, so make sure # it's listening on a firewalled interface. -l 127.0.0.1 # Limit the number of simultaneous incoming connections. The daemon default is 1024 # -c 1024 # Lock down all paged memory. Consult with the README and homepage before you do this # -k # Return error when memory is exhausted (rather than removing items) # -M # Maximize core file limit # -r # Use a pidfile -P /var/run/memcached/memcached.pid
Save 和 close 文件。 然后重启Memcached进程生效:
sudo systemctl restart memcached
步骤 4. 配置防火墙。
如果安装了 UFW,则需要在端口 11211 上创建 UFW 允许规则:
sudo ufw allow proto tcp from <your ip address> to any port 11211 sudo ufw reload
步骤 5. 使用 Memcached。
有许多 Memcached 客户端可用于 PHP、Python 等编程语言。 但是,要将 Memcached 用作 PHP 应用程序(例如 WordPress)的缓存系统,您需要为 PHP 安装 Memcached 扩展:
sudo apt install php-memcached
恭喜! 您已成功安装 Memcached。 感谢您使用本教程在 Debian 11 Bullseye 上安装最新版本的 Memcached。 如需更多帮助或有用信息,我们建议您查看 Memcached 官方网站.